 mbm.sting


Description
My main gaming computer was slowly being taken over by kids playing LEGO games and Minecraft, so I decided to build a console replacement type computer to keep hooked up to the TV.
I kept an eye one some parts for a few months, watching prices and slowing hashing out the details of which components to use. One day there was a great rebate on the PSU, so I got it. A few days later the motherboard was on sale and within a week I had bought all the parts at various sale points.
I had a friend with a skylake processor who helped me out with the motherboard BIOS upgrade. It went really smoothly, no issues at all. The system now runs perfectly.
Part Reviews
CPU
Great value!! Perfect performance for 1080p and won't make a dent in your budget. This chip really is carrying the banner (until Ryzen 3 at least).
Thermal Compound
I only got this because I had to do the BIOS upgrade so I was swapping CPUs in and out. This was the cheapest thermal paste on Jet at the time, and I ended up not even using it, my friend had a tube already opened so we used that.
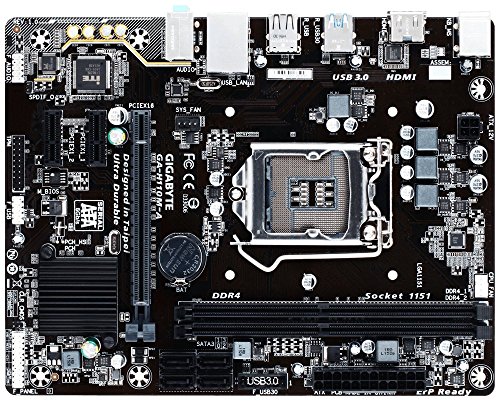
Motherboard
Updating the bios was pretty easy once with the right parts. The board works great, has all your basics covered, USB 3, HDMI output. I had no issues with getting it installed or getting it to work. For a simple build like this, you can't ask for much more.
Video Card
A budget card for a budget build.
So far the games I've played (rocket league, lego marvel, tony hawk) have all come across at 60fps. Not having an extra power connector also helps the inside stay clutter free.
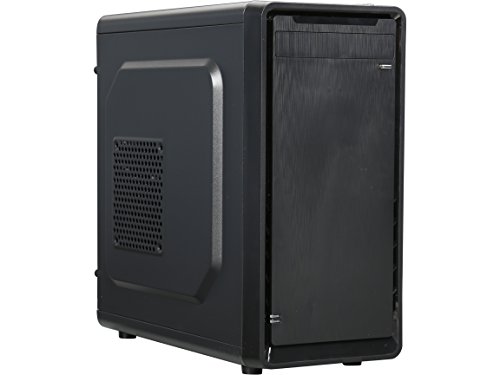
Case
Love this case, especially the price. You can tell it's a cheaply made case, but it didn't present any serious issues for my build. I love the matte finish (I hate gloss) and the front panel is nicely accessible. Two items that caused me slight issues while building.
There are holes in the motherboard mount plate for your PSU cables to go in and out (so that the bulk of the cabling is on the back side, hidden away). These holes were barely big enough for the plugs to fit through, I had to shimmy and jimmy the 24 pin to get it through, it was not easy.
The expansion slot covers are not screw on/screw off. You break them off and they're off for good. In order to break them off you have to push them IN to the case. I installed my whole system before breaking these off and my motherboard has some capacitors right in the way, not allowing these plates to bend in. I had to work for a few minutes with some pliers to get the plates to bend outwards to break them off. If you get this case, break out these plates before you place any components.
Power Supply
Love the semi-modular PSUs, easy to set up, helps so much with cable management (there's nothing to manage!) and makes the build process less clumsy not having to constantly re-position a bundle of wires.
The price/rebate I got on this unit makes it a no brainier in a budget build like this.
Custom
Someone local was selling these sticks, barely used (1 month). Even though I had planned on only doing 4GB in this simple build, I couldn't resist this good deal.
I have had no issues at all with these RAM sticks, and they look cool, helping the build quite a bit in the style department.
Custom
It's too bad that you never see your SSD, because this thing is a beauty. I seriously love the design on the SK Hynix drives. This drive makes everything super fast turning on and off (and quiet). It's low capacity isn't an issue since I can stream most of my games through steam. (I have a 2TB on my main rig).
Comments